


I’m so happy to share this low-carb cat cookie recipe, because it keeps treats simple and focused on what cats actually need. These small cookies are made with tuna, egg, and coconut flour, all of which are cat safe when used the right way. I like that this recipe is homemade and avoids grains, sugar, and unnecessary fillers. The cookies bake up firm and easy to portion for tiny treats. They work well as an occasional reward, not a meal replacement.
I started making these low-carb cat cookies when I wanted a treat that matched how cats naturally eat. My cat loves strong smells, and tuna always gets her attention right away. Making them at home helps me control exactly what goes into each bite.
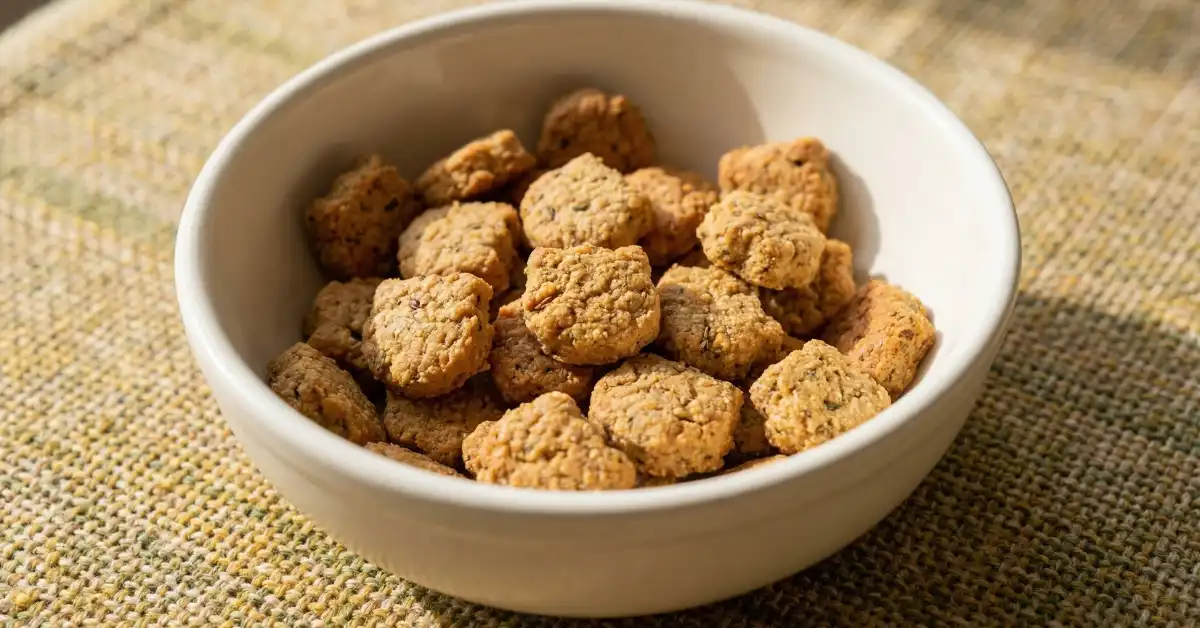
What makes these cookies special is their simple texture and high protein base. They are small, firm, and easy for cats to chew. Because they are low in carbs, they fit better as a treat for cats that need careful portion control.
Here are a few reasons I keep this recipe in my rotation:
- Grain free and low carb
- High protein, cat focused ingredients
- No added sugar or artificial flavors
- Easy to portion into small treats
Treats should only be a small part of your cat’s daily food. Please talk to your vet about what is safe and appropriate for your cat, especially if your cat has diabetes, kidney issues, or food sensitivities.
How to Make Low-Carb Cat Cookies
- Preheat the oven and line a baking sheet
- Blend the tuna and egg into a smooth base
- Mix in the coconut flour and optional herbs
- Adjust the dough so it holds together
- Roll out and cut into small pieces
- Bake until firm and lightly golden
- Cool completely before serving
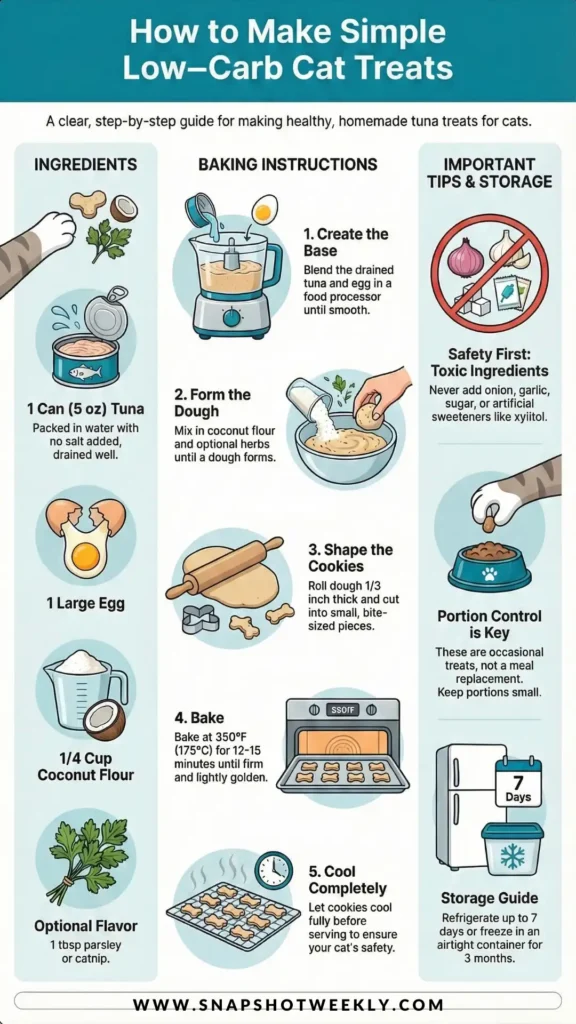
Ingredients
- 1 can (5 oz) tuna in water, drained well (no added salt)
- 1 large egg
- 1/4 cup coconut flour
- 1 tablespoon parsley or catnip (optional)
- 1 tablespoon water (only if needed to form the dough)
Directions
- Preheat your oven to 350°F (175°C) and line a baking sheet with parchment paper.
- Place the drained tuna and egg into a food processor. Pulse until they turn into a smooth paste.
- Add the coconut flour and the optional parsley or catnip. Pulse again until a dough forms.
- The dough should hold together and not feel sticky. If it seems too dry, add water one tablespoon at a time and pulse again.
- Roll the dough to about one third inch thick on a surface lightly dusted with coconut flour.
- Cut the dough into very small, bite sized pieces and place them on the baking sheet.
- Bake for 12 to 15 minutes until the edges look lightly golden and the cookies feel firm.
- Let the cookies cool completely before serving or storing to keep your cat safe.
Process Details
- The dough should feel soft but not wet. It should hold its shape when pressed.
- Thicker cookies stay a bit softer inside, while thinner ones turn firmer.
- Small cookie cutters or a knife both work well for shaping.
- Keeping the pieces small makes them safer and easier for cats to eat.
- Cookies are done when they feel firm and dry on the outside.
Tips for Success
- Always use tuna packed in water with no added salt.
- Never add onion, garlic, sugar, or sweeteners like xylitol.
- Keep treat sizes very small since these are extras, not meals.
- Stick to the listed ingredients and amounts.
- Adjust baking time slightly if you want a firmer or softer cookie.
- Talk to your vet before offering treats regularly, especially for cats with health issues.
Serving Ideas
- Offer one small cookie as an occasional reward
- Break cookies into tiny pieces for training or play
- Use as a special treat after grooming or nail trims
- Serve alongside regular meals, not instead of them
- Adjust portions based on your cat’s size and daily diet
Storage & Freezing
- Store cookies in an airtight container in the refrigerator for up to 7 days.
- Freeze treats in a sealed container for up to 3 months.
- Thaw frozen cookies in the refrigerator before serving.
- Firmer cookies usually last longer than softer ones.
- Discard any treats that smell off, look moldy, or feel sticky.

These low-carb cat cookies are a simple way to offer a homemade treat while keeping ingredients clean and cat focused. I enjoy making them because they are easy, portion friendly, and made with foods I recognize.
- Change the thickness for softer or firmer cookies
- Cut smaller pieces for kittens or senior cats
- Watch your cat closely the first time they try them
Sharing a homemade treat is a small but meaningful way to show love and care for your cat.


