


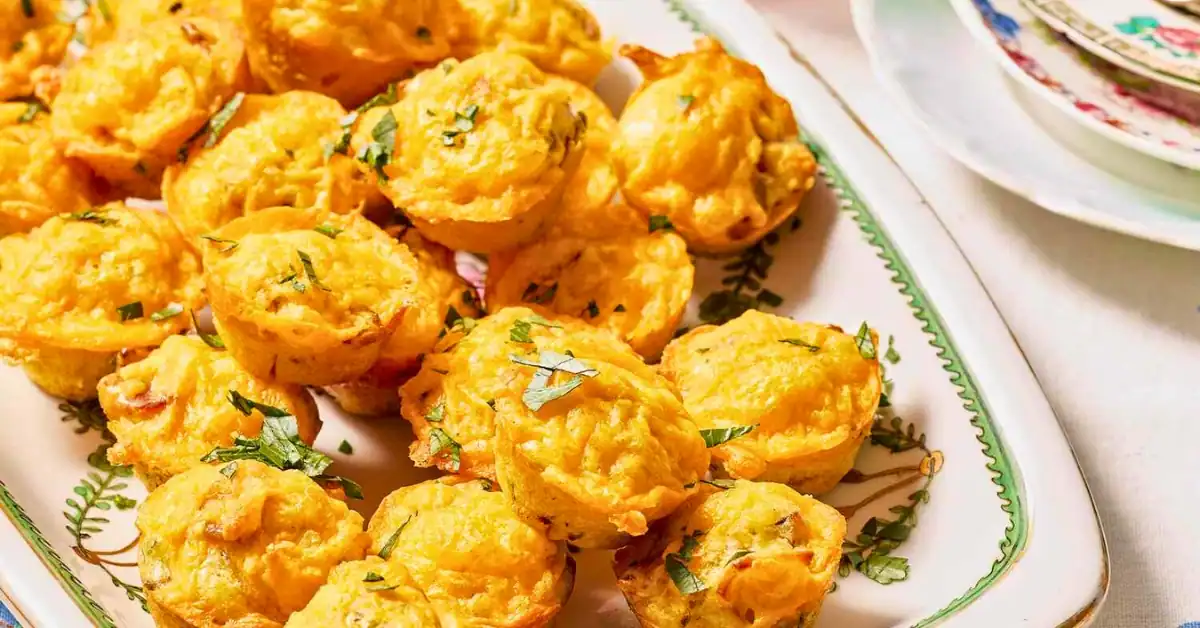
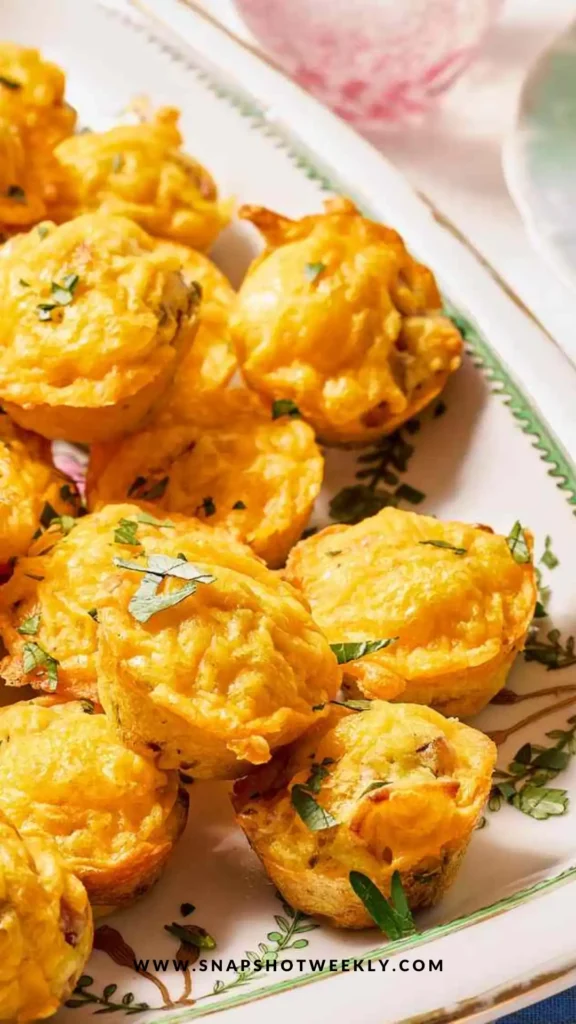
I’m so excited to share my Garlic-Herb Mini Quiches recipe with you! These little bites are not just adorable — they’re bursting with flavor from creamy garlic-herb cheese, fresh parsley, and a hint of chives. Perfect for brunch, parties, or just a fun snack, they’re easy to make and even easier to eat.
Level: Easy
Total Time: 25 minutes
Prep Time: 15 minutes
Cook Time: 10 minutes
Yield: 45 mini quiches
Course: Appetizer, Breakfast
Cuisine: American
I still remember the first time I made these Garlic-Herb Mini Quiches — my friends couldn’t believe something so simple could taste so sophisticated. The creamy garlic-herb filling melts perfectly into delicate phyllo tart shells, creating a bite-sized burst of flavor.
This recipe is perfect for beginners because it uses just a few ingredients but delivers impressive results. We’ll mix the cheese, milk, and eggs until smooth, fill each tiny shell, and bake until golden. A sprinkle of parsley (and optional chives) finishes them off beautifully.
Whether you’re hosting a brunch, making a party appetizer, or just craving a flavorful snack, these mini quiches are sure to impress.
How to Make Garlic-Herb Mini Quiches
These mini quiches are a perfect combination of creamy filling and crisp shells:
• Creamy garlic-herb spreadable cheese as the flavor base
• Eggs and milk to create a smooth, custardy filling
• Mini phyllo tart shells for a delicate, flaky bite
• Fresh parsley and optional chives for brightness and color
Every step is quick, making this a one-batch, fuss-free recipe.
Ingredients
• 1 package (6-1/2 ounces) reduced-fat garlic-herb spreadable cheese
• 1/4 cup fat-free milk
• 2 large eggs
• 3 packages (1.9 ounces each) frozen miniature phyllo tart shells
• 2 tablespoons minced fresh parsley
• Minced chives, optional, for garnish
Directions
- Preheat the Oven:
- Set your oven to 350°F (175°C).
- Prepare the Filling:
- In a small bowl, beat the spreadable cheese, milk, and eggs together until smooth and creamy.
- Fill the Tart Shells:
- Place the miniature phyllo tart shells on an ungreased baking sheet.
- Spoon about 2 teaspoons of the cheese mixture into each shell.
- Add Herbs:
- Sprinkle the minced parsley over each quiche.
- Add chives if desired for extra flavor and color.
- Bake:
- Bake for 10–12 minutes, or until the filling is set and the shells are lightly browned.
- Serve:
- Remove from the oven and serve warm for the best flavor and texture.
Process Details
- Mixing the Filling: Beating the cheese, milk, and eggs thoroughly ensures a creamy, smooth custard that bakes evenly in each tart shell.
- Mini Tart Shells: Using pre-made phyllo shells saves time and gives a crisp, delicate texture that contrasts nicely with the creamy filling.
- Herb Garnish: Fresh parsley and chives add freshness, color, and a subtle herbal flavor that brightens the dish.
Tips for Success
- Make sure the eggs and cheese are at room temperature for smoother mixing.
- Don’t overfill the shells; 2 teaspoons is just right to prevent spilling over during baking.
- Serve warm for the best flavor and texture — these quiches can get slightly firm as they cool.
- Experiment with other herbs like dill or tarragon for different flavor profiles.
Serving Ideas
- Perfect for brunch spreads or holiday appetizers.
- Serve alongside fresh fruit or a green salad for a complete mini-meal.
- Great for party platters with other bite-sized treats.
Storage & Freezing
- Refrigerator: Cool to room temperature and store in an airtight container for up to 3 days. Reheat gently in the oven for a few minutes before serving.
- Freezing: Not recommended — the delicate phyllo shells can become soggy after freezing.
Nutrition Info (Approximate per Mini Quiche)
- Calories: 31 kcal
- Protein: 1 g
- Carbohydrates: 2 g
- Fat: 2 g
- Saturated Fat: 0 g
- Cholesterol: 12 mg
- Sodium: 32 mg
- Sugar: 0 g
- Fiber: 0 g
My Garlic-Herb Mini Quiches are creamy, flavorful, and perfectly bite-sized — ideal for any brunch, party, or snack craving. Each little quiche delivers a punch of garlic and herbs, with a tender filling inside a crisp shell. I hope you enjoy making (and eating!) these as much as I do. Once you try them, they’ll become a favorite go-to appetizer in your kitchen!