


Do you dream of a small café corner right at home—somewhere you can sip a warm latte in the morning or make iced coffee for friends on the weekend? The good news: you don’t need a big budget or a huge kitchen. With a few smart choices and some simple styling, you can build a coffee bar that fits your space and your routine. In this guide, I’ll walk you through 16 easy ideas. For each one, you’ll get a plain-English overview, a short “what you need” list, and clear, step-by-step instructions. I’ll also share quick tips I use myself so your setup looks neat, works well, and feels like a tiny café you’ll love using every day.
#1 The Minimalist Coffee Bar
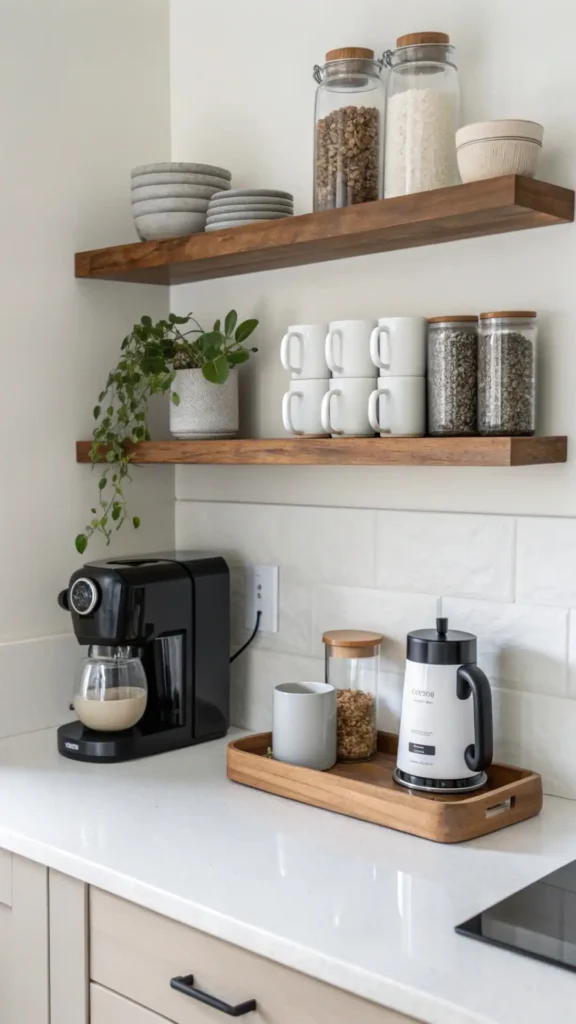
Less can be more—especially when you want your mornings to feel calm and uncluttered. A minimalist setup focuses on clean lines, light colors, and only the tools you actually use.
What you need:
Floating shelves, a simple tray, 2–4 favorite mugs, an airtight jar for beans/grounds, a compact coffee machine (drip, pod, or espresso), small trash bin.
Steps:
- Pick a bright wall or open counter spot with an outlet.
- Install one or two floating shelves at comfortable reach; keep spacing even.
- Place your machine on the counter and a small trash bin nearby for pods/filters.
- Set a tray next to the machine for spoons, sugar, and a small jar of beans.
- Hang or stack only the mugs you actually use each day—leave empty space on the shelf so the area feels open.
Tip: Match containers (same glass jars, same labels). Repeating the same look makes the space feel tidy and calm.
#2 Rustic-Chic Coffee Nook
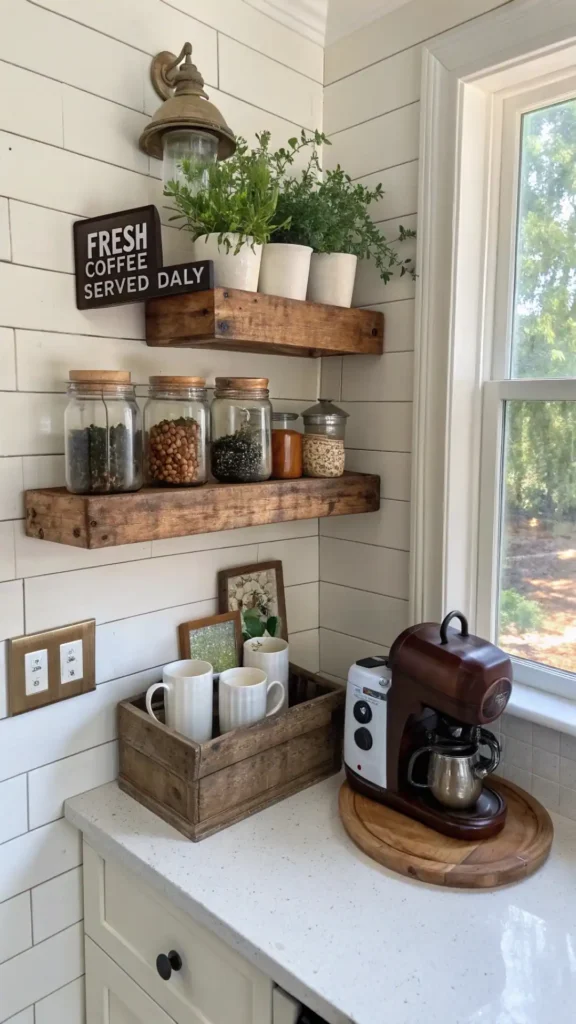
If you love cozy textures, warm wood, and little vintage touches, this one’s for you. Rustic-chic feels welcoming without being messy.
What you need:
Wooden shelves or a small console, mason jars, reclaimed wood tray, vintage-style sign, basket for filters.
Steps:
- Choose a corner or short wall so the nook feels intentional.
- Mount wooden shelves or place a console table with a natural wood finish.
- Fill mason jars with beans, sugar, and stir sticks; label them simply.
- Put your machine on the console and corral accessories on the tray.
- Add a small vintage sign or framed print above for charm.
Tip: Mix one metal accent (iron, bronze, or galvanized) with the wood so the space looks collected, not cluttered.
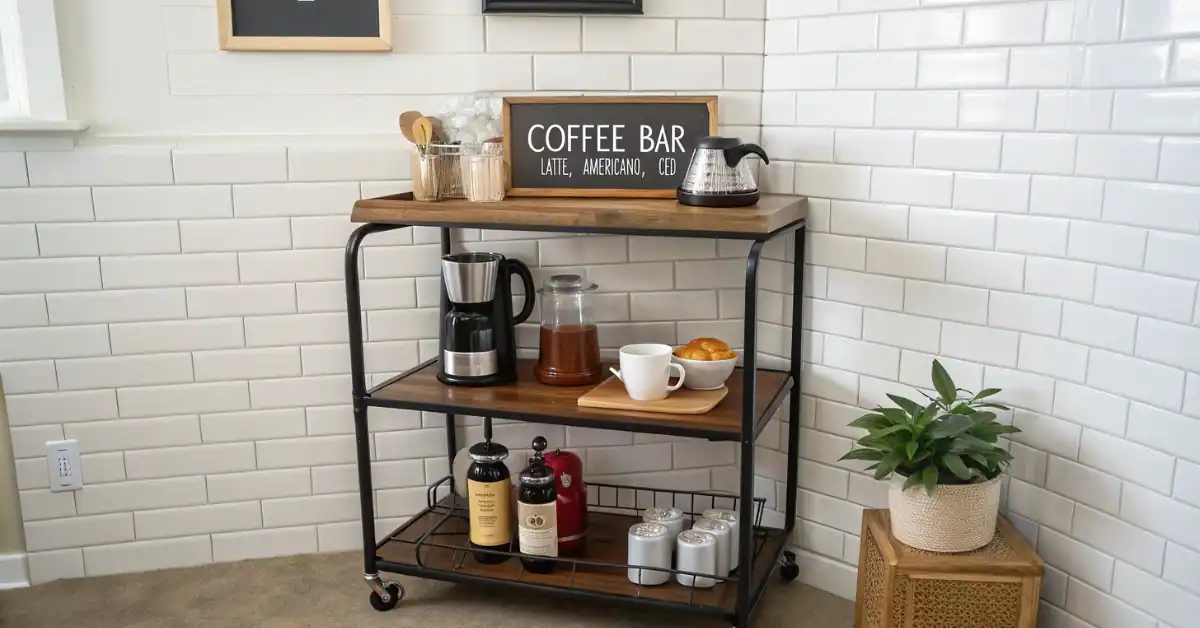
#3 The Coffee Cart Station
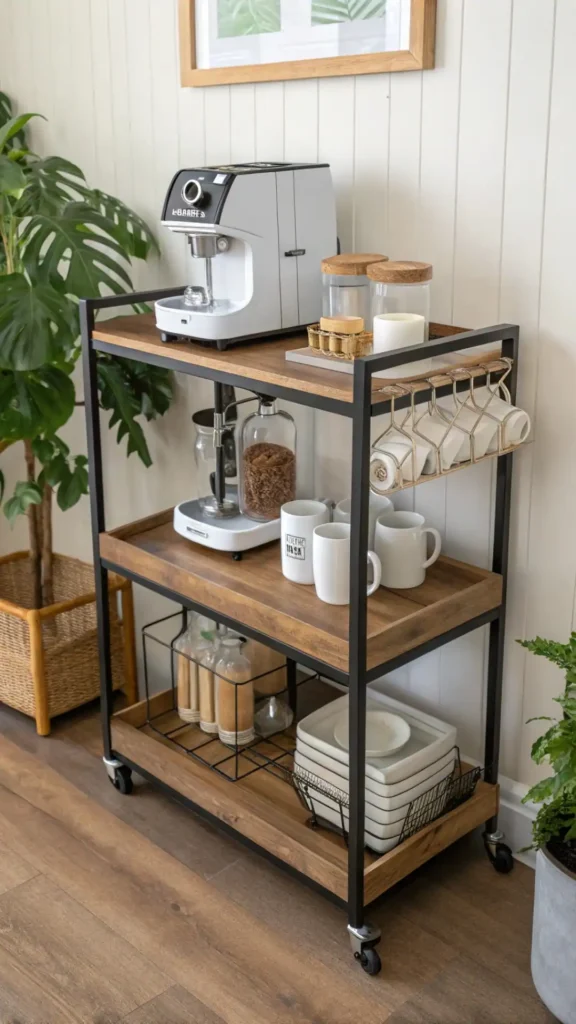
A rolling cart is perfect if you’re short on space—or if you like to serve coffee on the patio or in the living room.
What you need:
2–3 tier bar cart, S-hooks or adhesive hooks for mugs, heat-safe mat, small basket for napkins.
Steps:
- Place a heat-safe mat on the top shelf and set the machine on it.
- Use S-hooks on the cart’s side rail to hang 2–4 mugs.
- Store beans, syrups, and filters on the middle shelf in small bins.
- Keep extra cups and a clean towel on the bottom shelf.
- Wheel the cart near an outlet when in use; roll it aside when done.
Tip: Add locking wheels or wheel stoppers so the cart doesn’t move while pouring.
#4 Classic Café Vibes
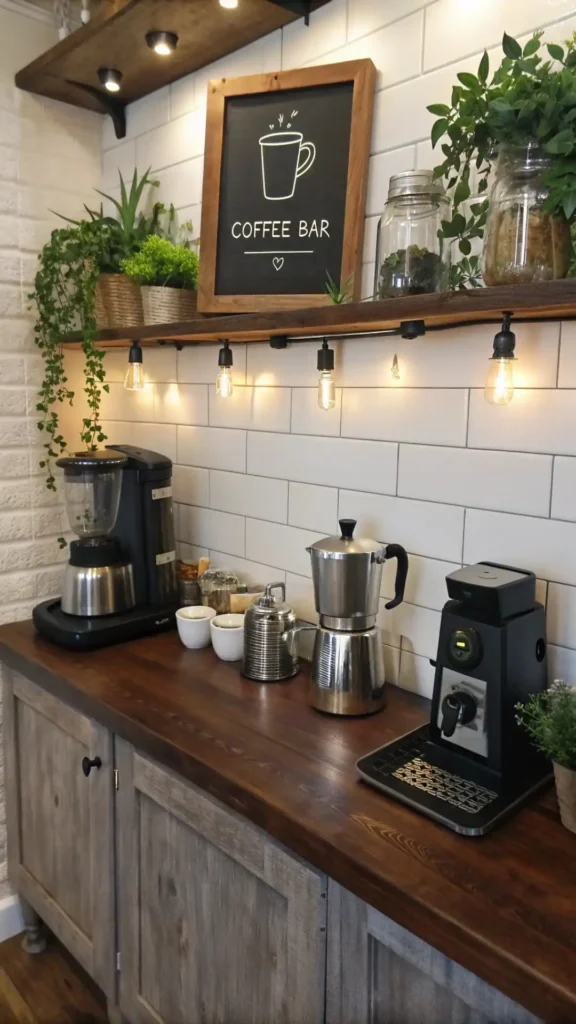
Think chalkboard menus, leafy plants, and timeless tools like a moka pot or pour-over kettle. It’s simple and charming.
What you need:
Wall-mounted chalkboard, plant (real or faux), moka pot or pour-over set, canister for sugar.
Steps:
- Hang a chalkboard above your station at eye level.
- Write a small “menu” (latte, cappuccino, iced coffee) with friendly hand-lettering.
- Place your everyday brewer on the counter; display the moka pot/pour-over as décor and backup.
- Add a small plant to soften the look.
- Keep sweeteners and stirrers in one neat canister.
Tip: Use the chalkboard for grocery reminders too—beans, milk, filters—so you never run out.
#5 Bookshelf Turned Coffee Haven
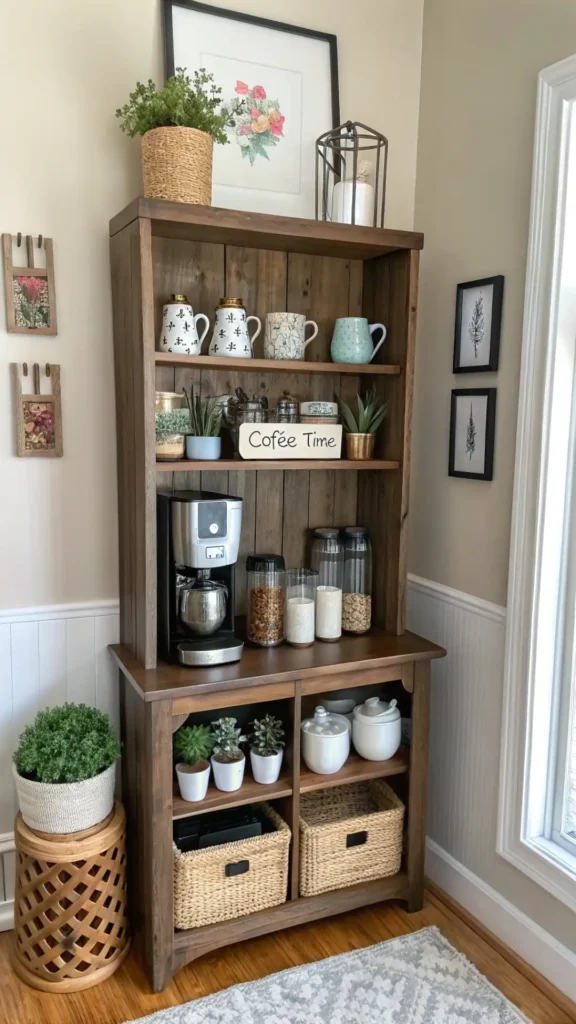
A simple bookshelf can become a full coffee zone with room for mugs, jars, and pretty displays.
What you need:
Sturdy bookshelf, baskets or bins, mug hooks (optional), drip tray or placemat.
Steps:
- Clear a shelf at counter height for the machine; add a placemat under it for drips.
- Dedicate the next shelf up for mugs and glasses.
- Use baskets for pods, tea bags, napkins, and to hide cords or clutter.
- Style the top shelf with a small frame or plant so it feels finished.
- Run a short power strip neatly down the back if outlets are limited.
Tip: Keep heavy items (machine, glass jars) on lower shelves for safety and stability.
#6 Industrial Coffee Bar

Love an urban look? Combine black metal, warm wood, and a few strong lines for an industrial setup that still feels homey.
What you need:
Metal-frame shelving or pipe shelves, wood plank top, matte black canisters, simple task light.
Steps:
- Choose a wall that can handle a bold shelf or a pipe-bracket unit.
- Mount shelves with wall anchors so everything is solid.
- Place the machine on the wood surface; keep cords tidy with clips.
- Store tools in matte black or charcoal canisters for a clean look.
- Add a slim task light or wall sconce for a café-style glow.
Tip: Keep décor minimal (one print, one plant). Industrial looks best with fewer, stronger pieces.
#7 DIY Pallet Coffee Bar
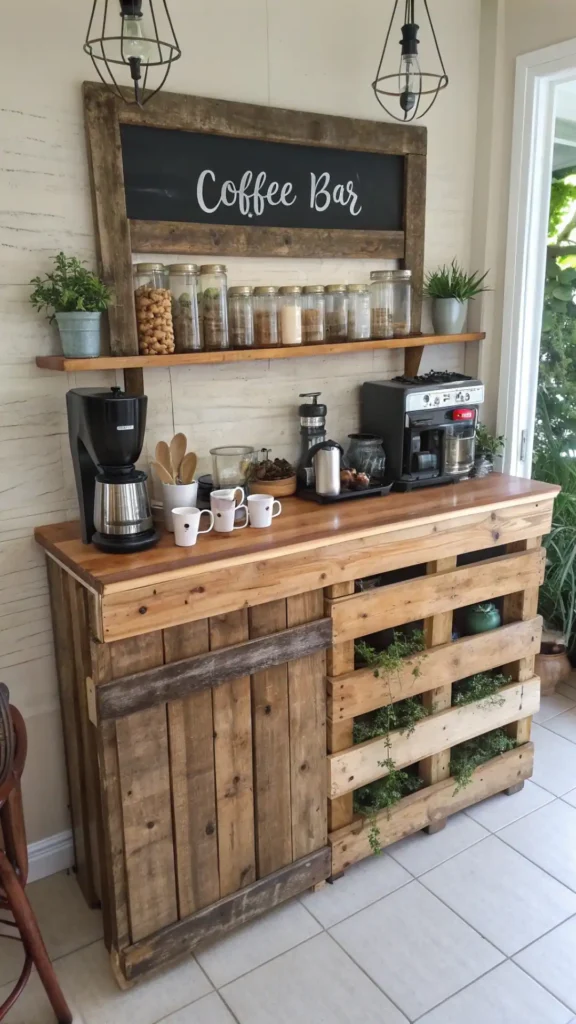
If you enjoy hands-on projects, a pallet bar gives you that rustic feel on a budget.
What you need:
Clean pallets, sandpaper, wood screws, stain or paint, simple countertop board, L-brackets.
Steps:
- Sand pallets to remove rough spots; wipe away dust.
- Stack or stand two pallets to form a base; secure with screws.
- Attach the countertop board on top using L-brackets from underneath.
- Stain or paint, then let it dry fully.
- Add hooks for mugs and a shelf or crate for beans and filters.
Tip: Seal the top with a clear coat so drips wipe off easily.
#8 Corner Coffee Nook
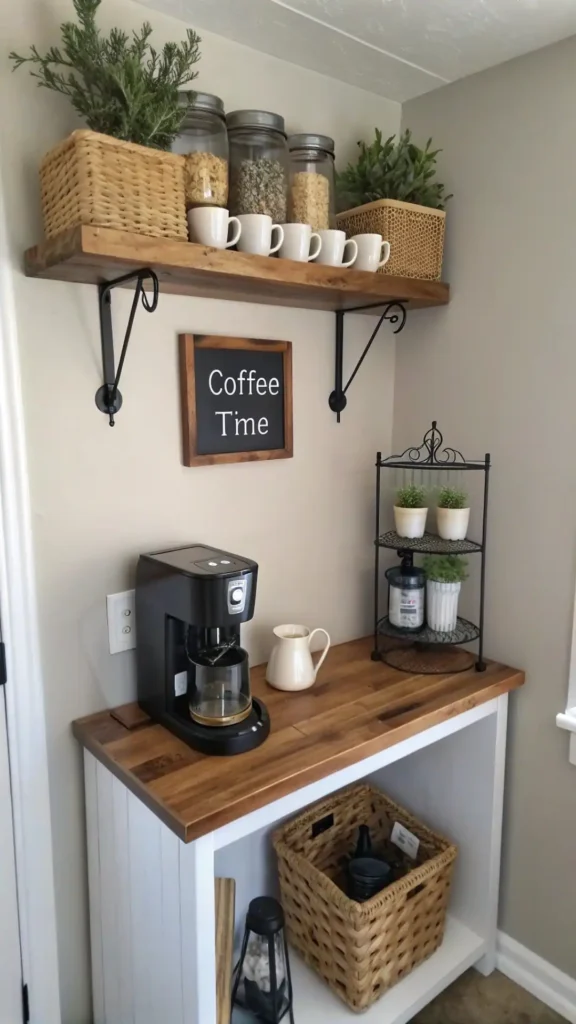
Turn an unused corner into a cozy spot that doesn’t interfere with cooking.
What you need:
Small corner shelf or triangle floating shelves, compact counter or wall-mounted fold-down shelf, mug hooks.
Steps:
- Measure the corner and install one or two corner shelves at practical heights.
- Place a small counter or fold-down shelf below for the machine.
- Add hooks under the lowest shelf for 3–4 mugs.
- Keep only the basics here: machine, beans, sugar, two spoons.
- Add a tiny art print to make the corner feel special.
Tip: Use a surge protector if your corner has multiple appliances sharing one outlet.
#9 All-in-One Breakfast Station

Combine coffee, toast, and quick grab-and-go items into a single, super-efficient area.
What you need:
Toaster, coffee machine, shallow bins for cereal/granola, fruit bowl, small cutting board, napkins.
Steps:
- Line up the toaster and coffee machine with a safe gap between them.
- Use shallow bins for cereal, granola, or instant oats; label the fronts.
- Keep spoons, napkins, and small bowls together in one drawer or bin.
- Place a fruit bowl up front so it’s the first thing you reach for.
- Add a small cutting board for quick spreads or slicing fruit.
Tip: Create a “morning flow”—left to right: cups → machine → milk/sugar → cereal/fruit—so making breakfast feels smooth.
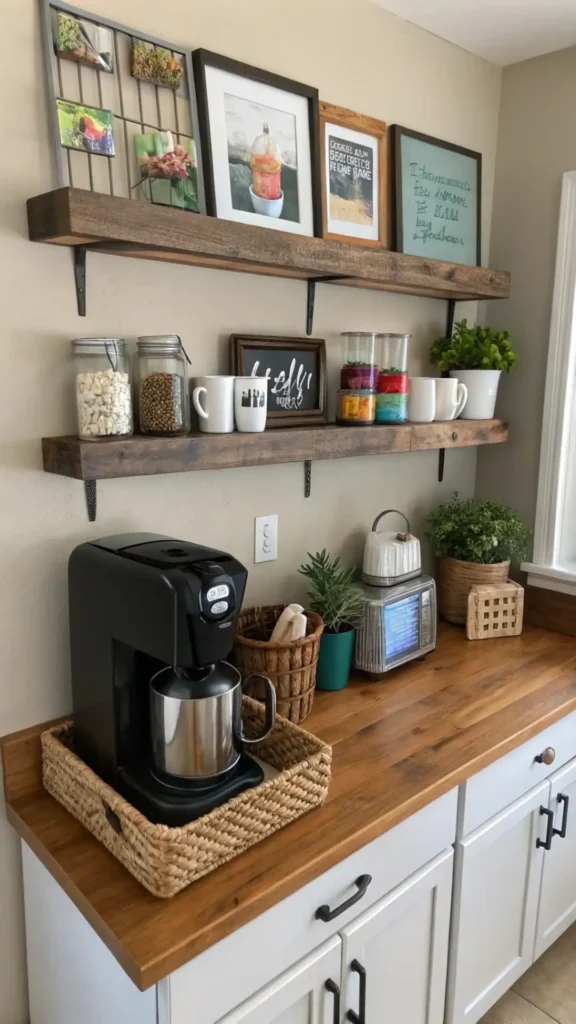
#10 Farmhouse Coffee Bar
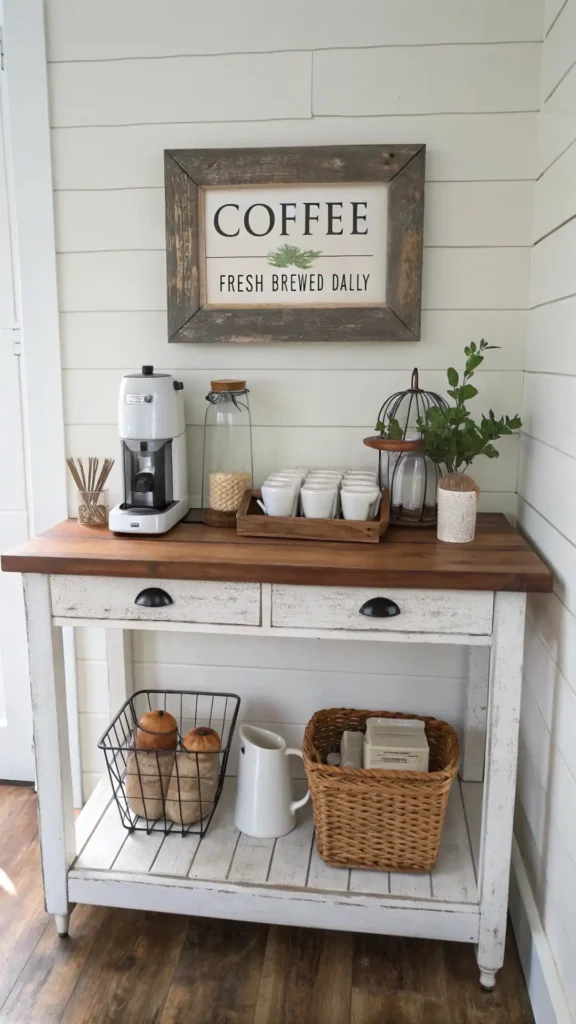
Whitewashed finishes, wire baskets, and simple greenery give that country-cozy feeling that never goes out of style.
What you need:
White or light wood console, wire baskets, simple “coffee” sign, white mugs, small greenery.
Steps:
- Place the console against a kitchen or dining wall.
- Set the coffee machine on one side; balance it with a plant on the other.
- Slide wire baskets underneath for filters, pods, and linens.
- Stack or hang white mugs so they’re easy to grab.
- Add a clean “coffee” sign or stenciled label to tie it together.
Tip: Mix one natural texture (jute runner or woven tray) to warm up the white tones.
#11 Hidden Coffee Cabinet
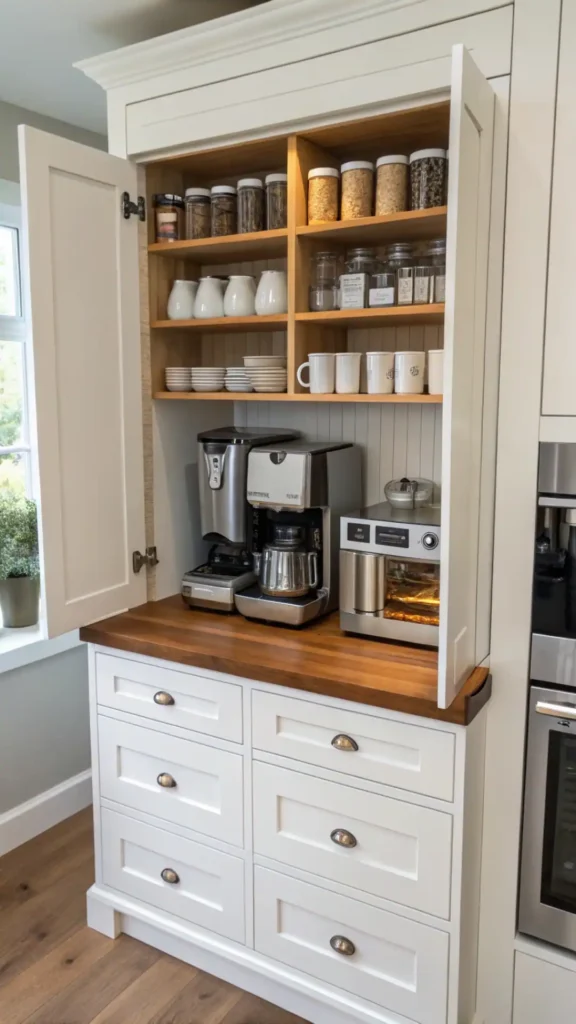
Prefer a clean kitchen with less on display? Tuck everything inside a cabinet and pull it out only when you need it.
What you need:
Cabinet with outlets nearby, pull-out shelf or tray, drawer dividers, cable clips.
Steps:
- Clear one tall cabinet or pantry section for your setup.
- Add a pull-out shelf so the machine slides forward when brewing.
- Use drawer dividers for pods, filters, and small tools.
- Clip cords to the back wall so they don’t snag.
- After brewing, slide everything back in and close the doors.
Tip: Stick a small heat-proof pad under the machine to protect the shelf from steam and drips.
#12 Vertical Coffee Bar
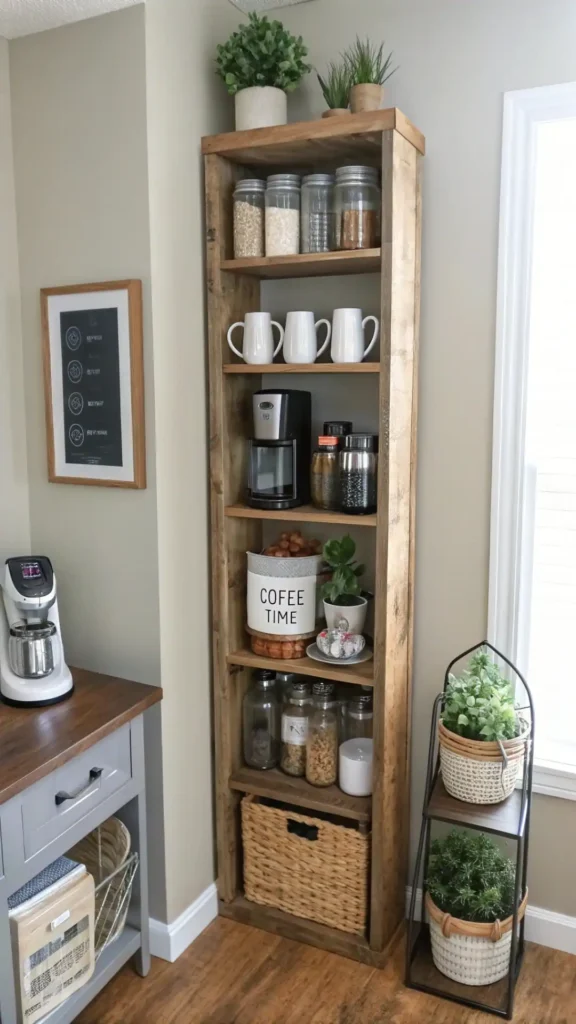
When floor space is tight, build up. A vertical setup stores everything without crowding your counters.
What you need:
Tall shelving unit or ladder shelf, narrow canisters, stackable bins, over-shelf mug rack.
Steps:
- Place a tall shelf near an outlet; anchor it to the wall for safety.
- Set the machine on the lowest sturdy shelf.
- Use narrow canisters for beans and sugar on the next shelf up.
- Add a mug rack under that shelf to free up more space.
- Keep lighter items higher and heavier items lower.
Tip: Repeat one color (black, white, or wood) in every tier so the tall stack feels coordinated.
#13 Luxury Coffee Station
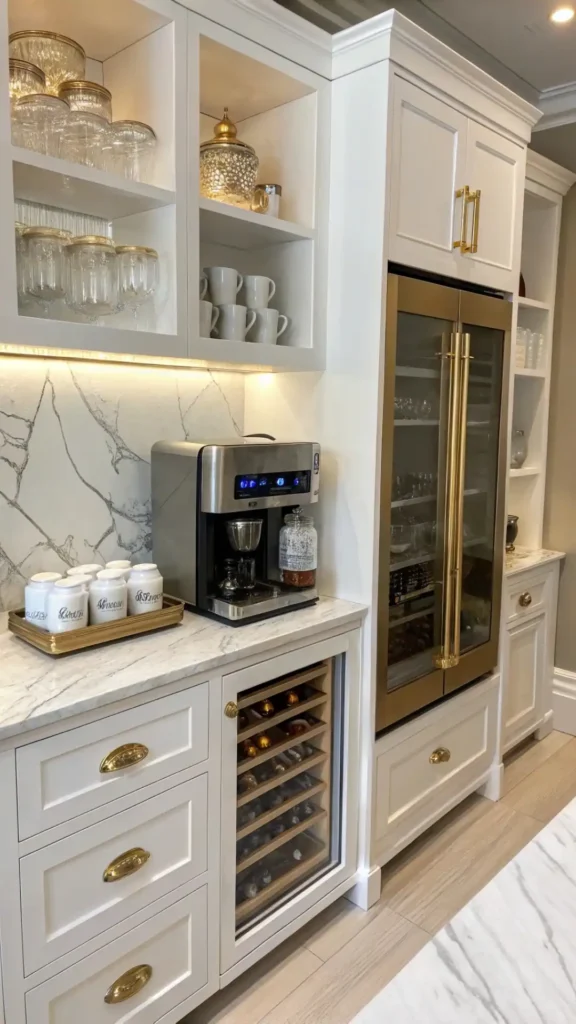
If you want the “wow,” go for elevated finishes and a few special tools that make everyday brewing feel like a treat.
What you need:
Built-in or high-end machine, marble or stone slab, gold/brass hardware accents, glass canisters, mini fridge (optional).
Steps:
- Choose a stable counter and place a stone or marble slab under the machine for a polished look.
- Decant beans, sugar, and cocoa into matching glass canisters.
- Use a small tray for syrups and spoons so everything looks orderly.
- Add a mini fridge or wine fridge for milk and cold brew (optional).
- Finish with warm metal accents—gold spoons, brass handle on a drawer, or a metal frame.
Tip: Keep the layout simple; let the finishes shine instead of crowding the space with décor.
#14 Seasonal Coffee Bar Décor
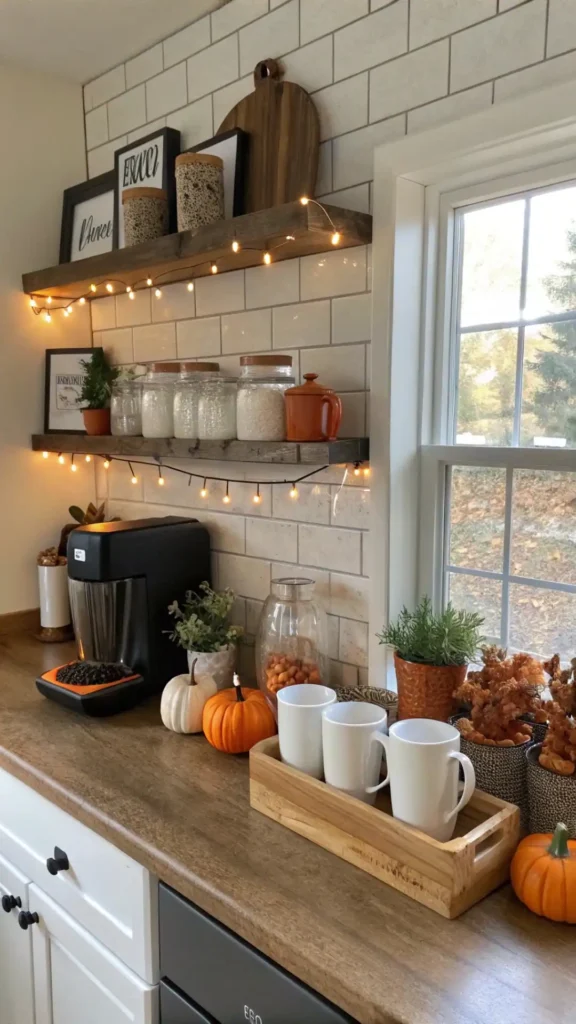
Refreshing your coffee bar for each season keeps the space fun and photo-worthy without starting from scratch.
What you need:
A small storage bin for seasonal swaps, a neutral base (tray, jars, mugs), 2–3 themed items per season.
Steps:
- Create a neutral “base set” you use all year—tray, plain mugs, clear jars.
- For fall, add mini pumpkins and a cinnamon stick jar; for winter, add twinkle lights and candy cane stirrers; for spring, add pastel napkins and tulips; for summer, add citrus slices and clear straws.
- Limit each season to 2–3 swaps so it doesn’t get busy.
- Store out-of-season items in one labeled bin.
- Change the look in five minutes by swapping just those pieces.
Tip: Keep one seasonal mug up front and rotate it—little changes make mornings feel new.
#15 Colorful Coffee Corner
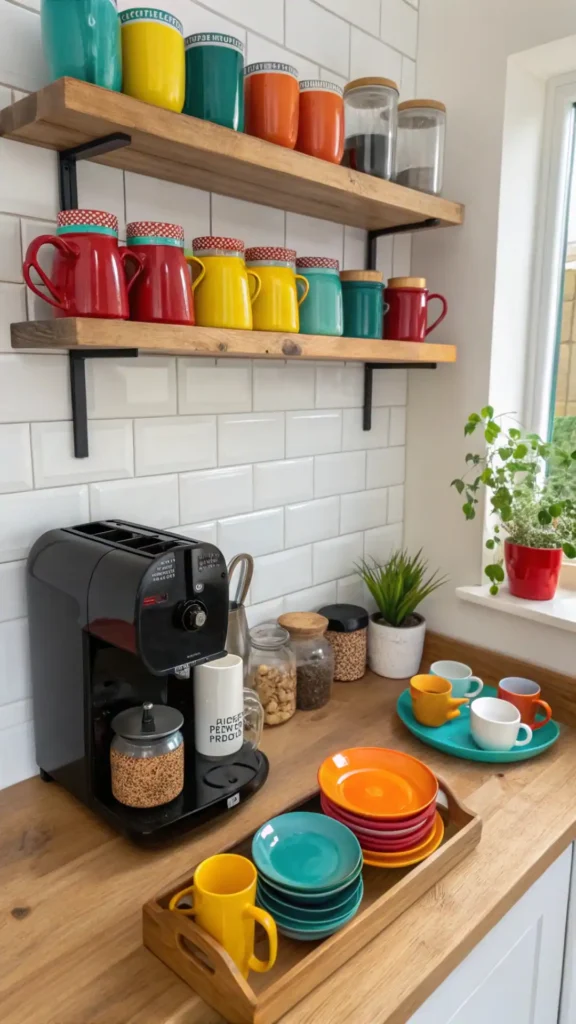
If neutrals aren’t your thing, add bright shades that make you smile every time you brew.
What you need:
Colorful mugs, bold canisters, a bright tray, playful art print, peel-and-stick backsplash (optional).
Steps:
- Pick one main color (teal, coral, mustard) and one helper color (white or wood) to balance it.
- Use a fun tray and matching canisters for sugar and beans.
- Hang a small art print or magnet board in your main color.
- If you want more pop, add peel-and-stick tiles behind the station.
- Keep the rest simple so the color takes center stage.
Tip: Repeat your main color in three spots (mugs, tray, print) for a pulled-together look.
#16 Coffee Bar with a Personal Touch
Your café corner should feel like you. Add memories and small details that make the space special.
What you need:
Framed photos, travel mugs/souvenirs, custom labels, a small keepsake dish.
Steps:
- Choose one small area (top shelf or a wall section) for personal items.
- Frame a favorite photo from a café you loved or a trip you took.
- Display one travel mug or a tiny souvenir next to your jars.
- Make simple labels with your handwriting for a warm, personal feel.
- Use a keepsake dish for sugar cubes or tea bags.
Tip: Personal touches are strongest when they’re simple. Aim for one or two—let them tell the story.
How to Keep Your Coffee Bar Easy to Use (and Easy to Love)
A great coffee bar isn’t just cute—it works smoothly every day. Here’s the simple routine I follow:
- Zone your tools: Cups and spoons near the machine; beans and filters just behind; extras (syrups, tea) a shelf up or down.
- Tidy as you brew: While coffee runs, wipe drips and put spoons back on the tray.
- Refill day: Pick one day a week to top up beans, sugar, napkins, and give the machine a quick clean.
- Label lightly: Clear, simple labels stop the “where is it?” hunt and help guests help themselves.
- Keep cords neat: Use clips or a cord channel so your setup looks clean and feels safe.
Simple Milk-Frothing Setup (No Fancy Gear Needed)
If you love lattes, you don’t need a big machine to get foam.
What you need:
Small handheld frother or French press, microwave-safe jar or small pot, milk of choice.
Steps:
- Warm milk gently (stovetop or microwave—don’t boil).
- Use a handheld frother to whisk until foamy, or pump a French press plunger up and down for 20–30 seconds.
- Pour coffee first, then spoon or pour the foam on top.
- Dust with cocoa or cinnamon if you like.
Tip: Whole milk foams easiest; oat milk does well too. Start with small amounts to learn what you like.
Quick Organizing Checklist (Print-Friendly)
- 2–4 daily mugs within easy reach
- Beans/grounds in an airtight jar (front and center)
- Filters/pods in one small bin
- Spoons + napkins on a tray
- Wipeable mat under the machine
- One small trash can nearby
- Weekly refill + quick clean routine
Building your own café corner isn’t about buying the most equipment—it’s about shaping a small, happy routine that fits your mornings. Start with one idea that matches your space: a rolling cart for flexibility, a hidden cabinet for a clean look, a bookshelf for extra storage, or a colorful corner that shows your personality. Keep the steps simple, use containers that make sense, and repeat colors and textures so everything looks intentional. Most of all, make it easy to use—your future self will thank you at 7 a.m.
Whether you go minimalist or rustic, industrial or farmhouse, luxe or seasonal, these 16 ideas give you a clear path to a coffee bar you’ll actually use and love. Set it up once, give it five minutes of care each week, and enjoy café-style moments right at home—every day.