


I’m excited to show you how to make a Butter Pie Crust that’s flaky, tender, and easy. Think of it like building a cozy blanket for your pie: cold butter makes little layers that puff and crisp in the oven, and a quick chill keeps everything neat and simple. We’ll use basic ingredients, clear steps, and kid-friendly explanations so every bite turns golden and crunchy.
Level: Easy
Total Time: 1 hour 15 minutes (includes chilling)
Prep Time: 15 minutes
Cook Time: Varies by filling (and if blind-baking)
Yield: 1 double crust (or 2 single crusts)
Cuisine: American
The first time I made this crust, I was nervous about “getting it right.” Then I learned one simple secret: keep everything cold and don’t fuss with the dough too much. Once I treated the butter like tiny ice cubes that shouldn’t melt in my hands, the crust turned out light and flaky.
If you can stir, pinch, and roll, you can make this—no fancy tools needed.
Description
Here’s what makes this crust a winner:
- All-butter flavor that tastes rich and clean
- Flaky layers that shatter gently when you cut a slice
- Fits sweet pies (apple, berry, custard) and savory pies (chicken pot pie, quiche)
- Works for single- or double-crust pies and for blind-baking (pre-baking)
- Simple method that’s friendly for beginners and fast for busy days
Ingredients
- 2 ½ cups all-purpose flour
- 1 cup unsalted butter, cold and cubed
- 2 tablespoons granulated sugar (use 1 teaspoon for savory pies)
- 1 teaspoon fine salt
- 6–8 tablespoons ice water (keep extra ice water nearby just in case)
Optional (pick what fits your pie):
- 1 teaspoon lemon juice or apple cider vinegar (helps tenderness)
- 1 egg beaten with 1 tablespoon water for brushing the top (shine)
- 1 tablespoon coarse sugar for sprinkling on sweet pies
- ½ teaspoon dried herbs (like thyme) for savory pies
Directions
- Prepare the Cold:
o Cut the butter into small cubes and put it back in the fridge.
o Fill a cup with ice and water so the water stays very cold. - Mix the Dry:
o In a large bowl, whisk flour, sugar, and salt so every bite tastes even. - Cut in the Butter:
o Add cold butter to the bowl.
o Use a pastry cutter or your fingertips to pinch the butter into the flour until you see a bowl of sandy crumbs with pea-sized bits of butter.
o Stop while you still see small butter pieces—those make flakes. - Add Ice Water, Gently:
o Sprinkle in 4 tablespoons ice water and toss with a fork.
o Add more water 1 tablespoon at a time, tossing after each, until the dough holds together when you squeeze a handful.
o The dough should feel cool and a little shaggy, not sticky or wet. - Form and Chill:
o Turn the dough onto the counter, gently press it together, and split into 2 equal piles.
o Press each pile into a flat disc (like a thick pancake).
o Wrap each disc tightly and chill for at least 1 hour (this rests the dough so it rolls easily). - Roll It Out:
o Lightly flour your counter and rolling pin.
o Roll one disc from the center out, turning the dough a quarter turn after each couple of passes, until it’s about ⅛ inch thick (about two stacked coins).
o Fit it into your pie plate without stretching—lift and drop the dough in so it settles. - Finish the Crust:
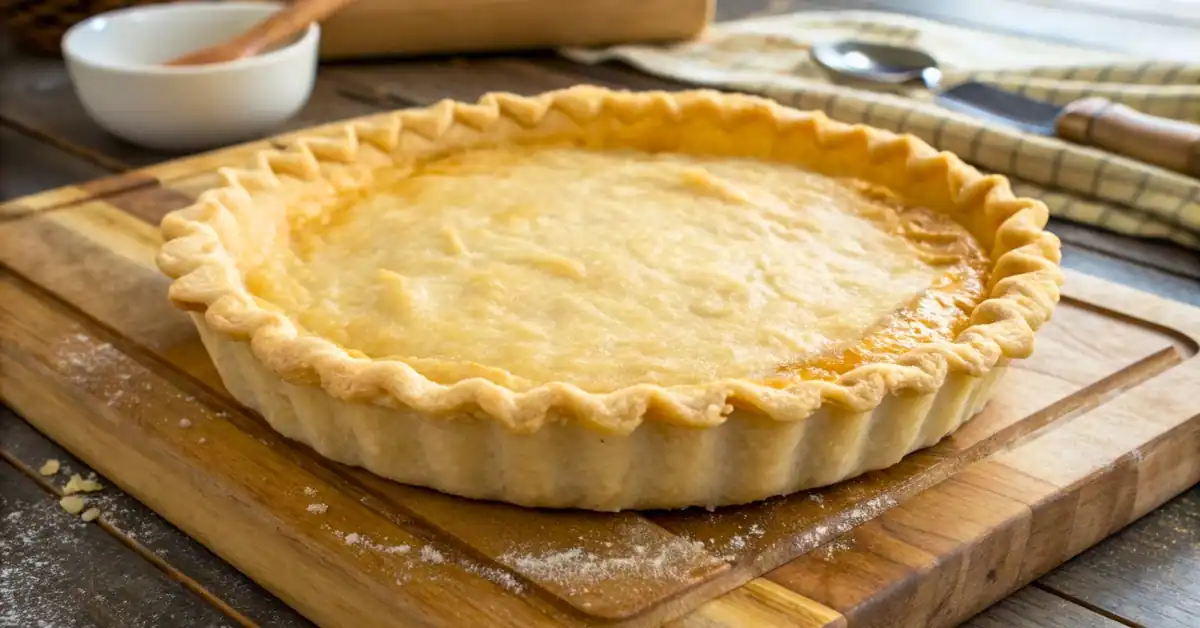
For a Single-Crust Pie (unbaked filling):
o Trim the edge with scissors, leaving about 1 inch extra.
o Fold the extra under itself to make a thick rim and crimp with your fingers or a fork.
o Fill according to your pie recipe and bake as directed.
For a Double-Crust Pie:
o Add your filling to the bottom crust.
o Roll the second disc to ⅛ inch thick and place on top.
o Trim, fold, and crimp the edges.
o Cut a few small slits on top so steam can escape. Brush with egg wash if you like shine.
For Blind-Baking (pre-baking for custards/cream pies):
o Chill the shaped crust in the pie plate for 20 minutes.
o Line with parchment and fill with pie weights or dry beans.
o Bake at 400°F (205°C) for 15–17 minutes until the edges look set.
o Lift out weights and parchment, then bake 5–8 minutes more for a pale shell or 10–12 minutes for a deeper golden shell.
Process Details
- Why cold butter matters: Cold butter melts in the oven, making tiny steam pockets. Those pockets lift the layers and create flakes. Warm butter won’t do that as well.
- Why we don’t overmix: If you mash the dough until it’s super smooth, you lose those butter pockets and the crust turns tough. Stop when it just holds together.
- Why we rest the dough: Resting lets the flour relax, so the dough doesn’t spring back when you roll it. It also keeps the butter cold.
- How much water is “right”: The dough should stick together when squeezed but not feel sticky on the outside. If it crumbles apart, add a tiny splash more water.
- Blind-baking basics: The parchment and weights stop bubbles and shrinking. Removing them halfway lets the bottom turn crisp, so it won’t get soggy later.
Tips for Success - Keep tools cool: If your kitchen is warm, chill the bowl and rolling pin for 10 minutes.
- Touch the dough less: Quick hands keep butter cold and layers intact.
- Flour lightly: Too much flour on the counter makes the crust dry; use just enough so it doesn’t stick.
- Patch, don’t panic: If the dough tears, press on a small dough patch and keep going.
- Nice edges: For neat slices, chill the assembled pie 10–15 minutes before baking so the crimp holds its shape.
Serving Ideas
- Sweet: Apple, cherry, blueberry, pumpkin, pecan, or chocolate cream.
- Savory: Chicken pot pie, veggie pot pie, quiche, or tomato pie.
- Finishing touches: Sprinkle coarse sugar on sweet pies or a pinch of flaky salt on savory ones.
Nutrition Info (Approximate per Serving)
- Serving Size: 1 slice of crust from an 8-slice pie (crust only)
- Calories: ~240
- Carbohydrates: ~22g
- Fat: ~16g
- Saturated Fat: ~10g
- Protein: ~3g
- Sodium: ~180mg
- Sugar: ~1g
This Butter Pie Crust is simple, reliable, and tasty. Keep the butter cold, add water slowly, and let the dough rest—those three moves make a flaky crust every time. Once you try it, you’ll feel confident making pies for any occasion, from busy weeknights to big holidays. Happy baking!


